Step 1: Update Google Chrome:
Before proceeding, ensure that you are using the latest version of Google Chrome. Updating to the latest version will provide you with the most up-to-date features and security enhancements. If you are unsure whether you have the latest version, you can download Google Chrome from the official website (https://www.google.com/chrome/).
Step 2: Activating Microphone Permissions:
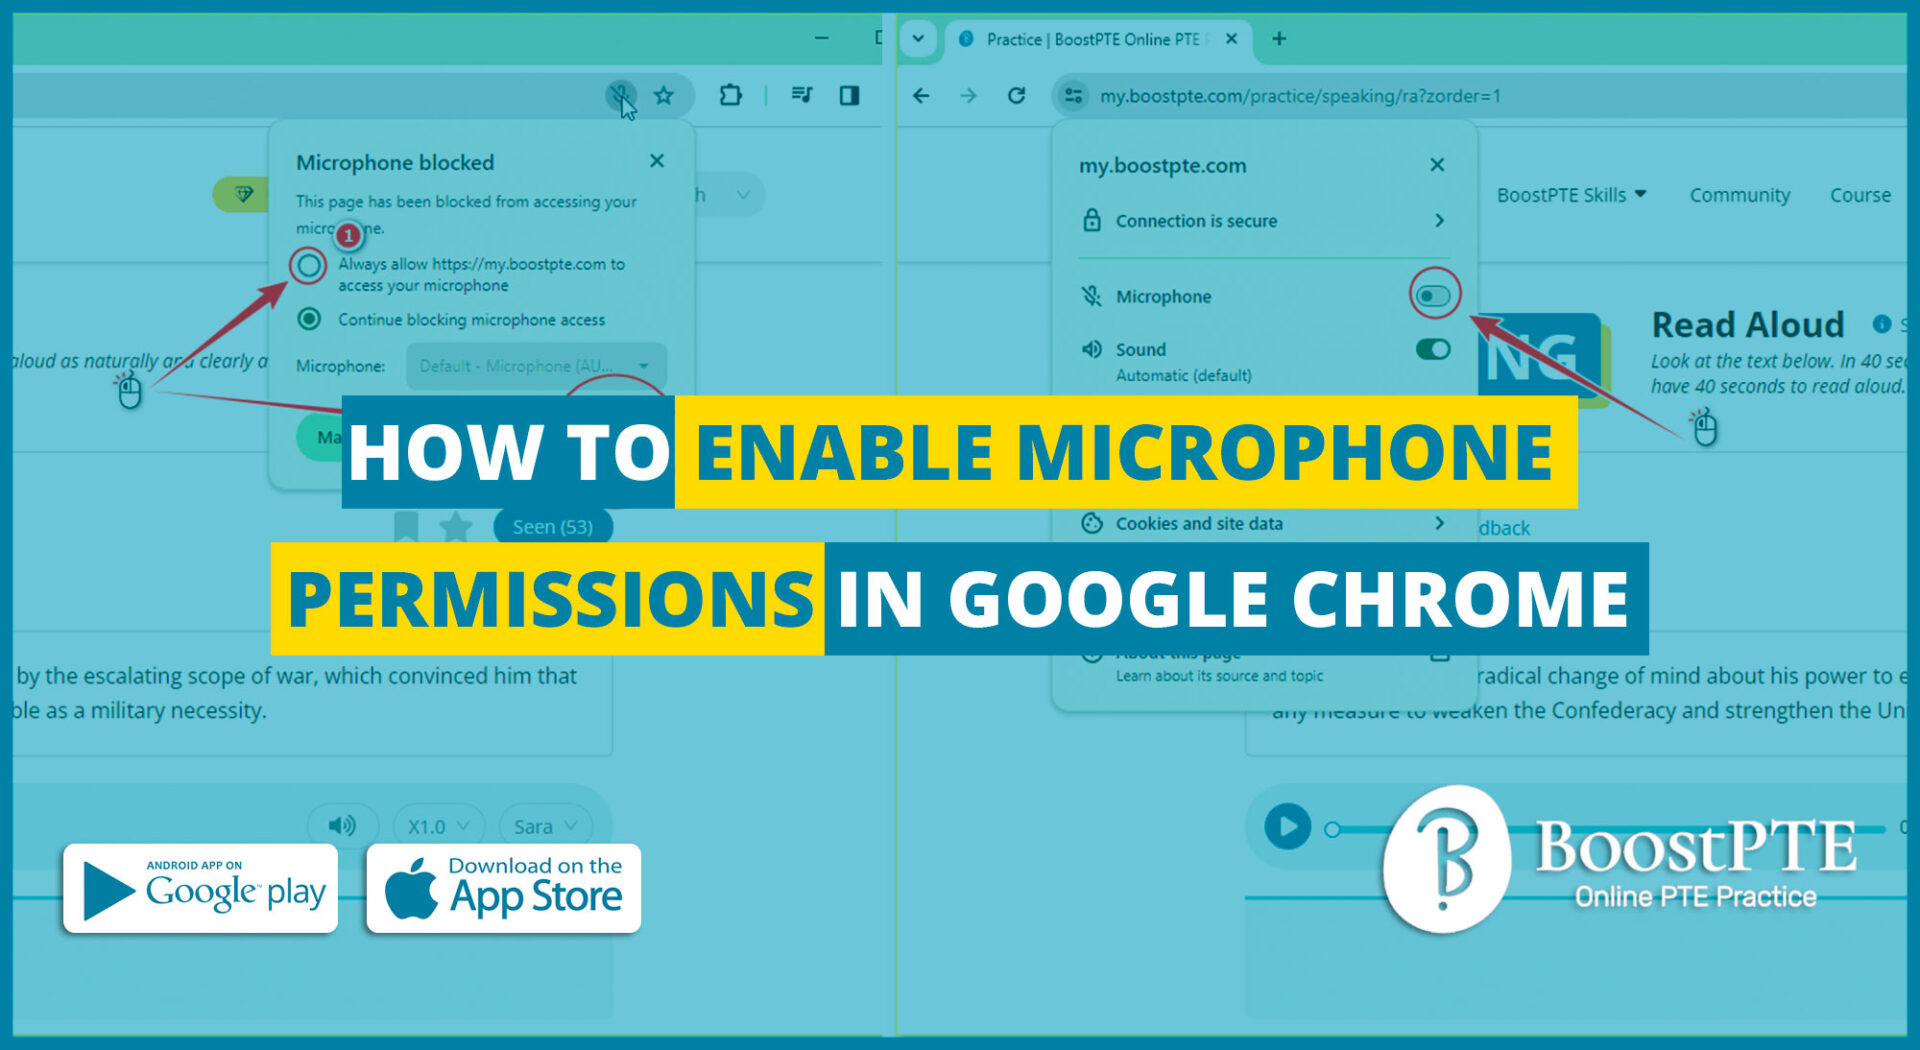
Once you have the latest version of Google Chrome installed, follow the steps below to activate microphone permissions:
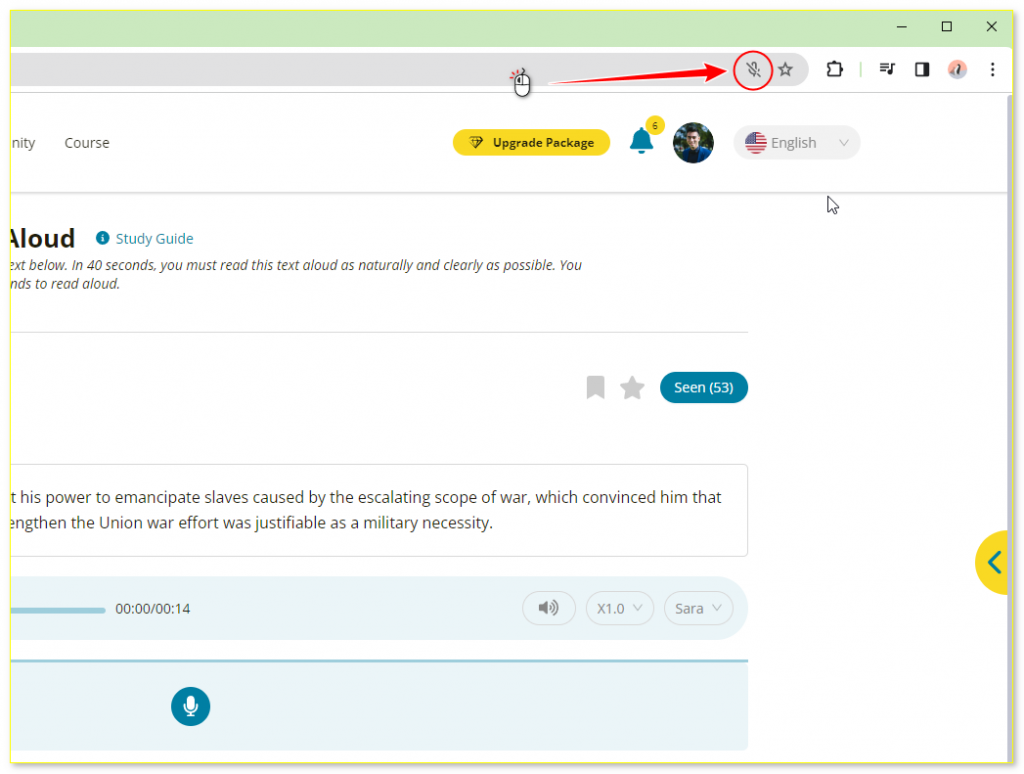
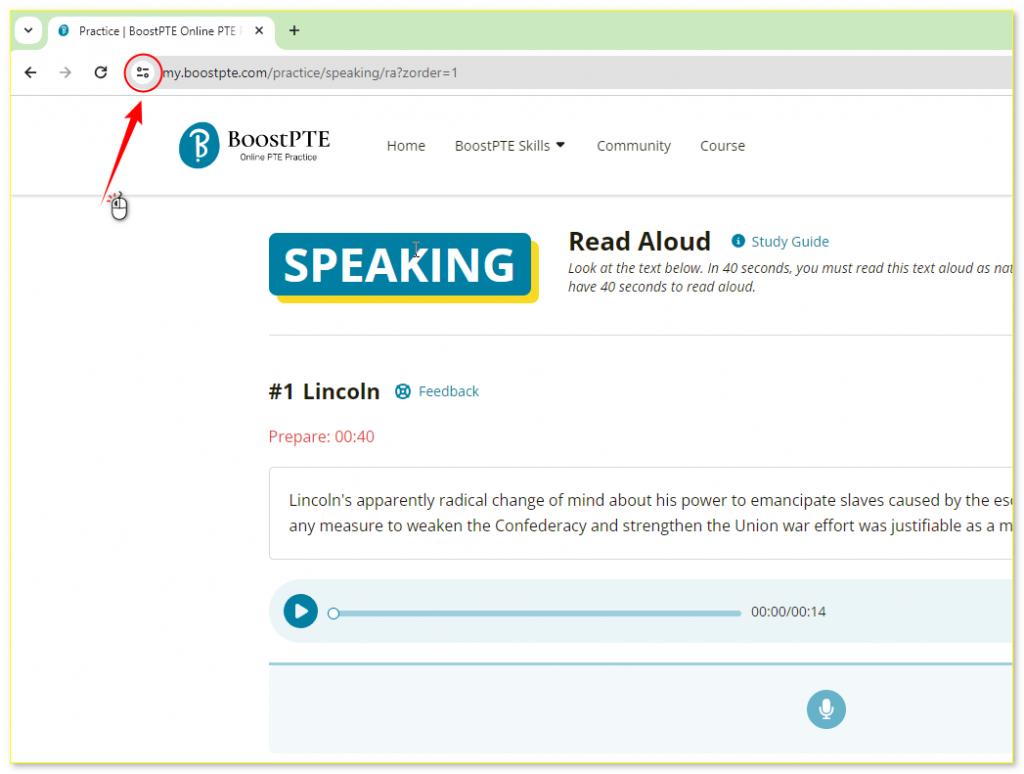
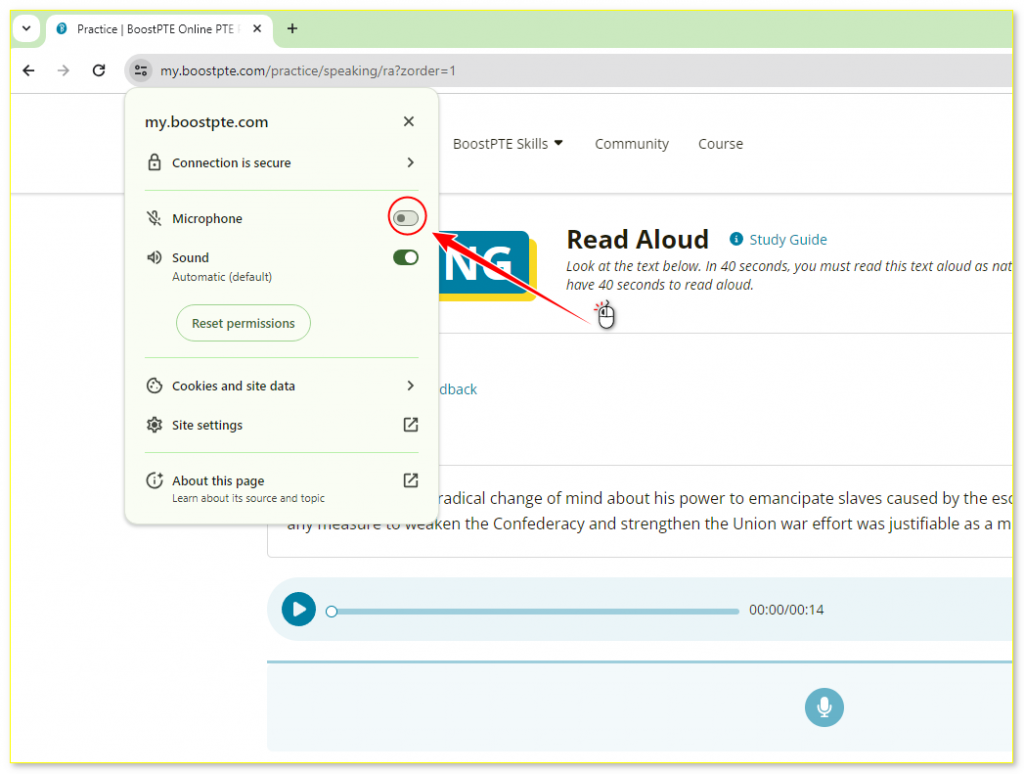
1. Locate the microphone permission button: In Google Chrome, the microphone permission button is usually located at the top-right corner of the browser window. It resembles a small microphone icon.
2. Click on the microphone permission button: Click on the microphone icon to open the permissions menu.
or
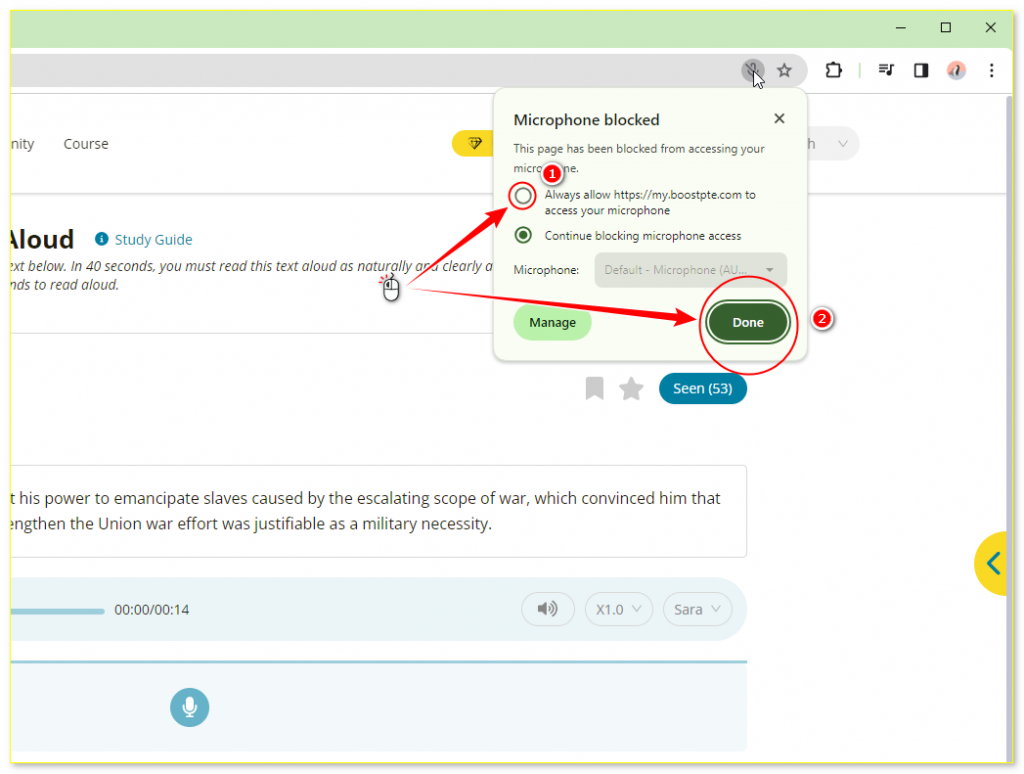
3. Select “Always allow”: From the drop-down menu, choose the option that says “Always allow.” This ensures that your microphone will have unrestricted access when using websites or applications.
or
4. Click “Done”: After selecting “Always allow,” click the “Done” button to save your changes.
Step 3: Finalizing the Process:
To complete the process, follow these final steps:
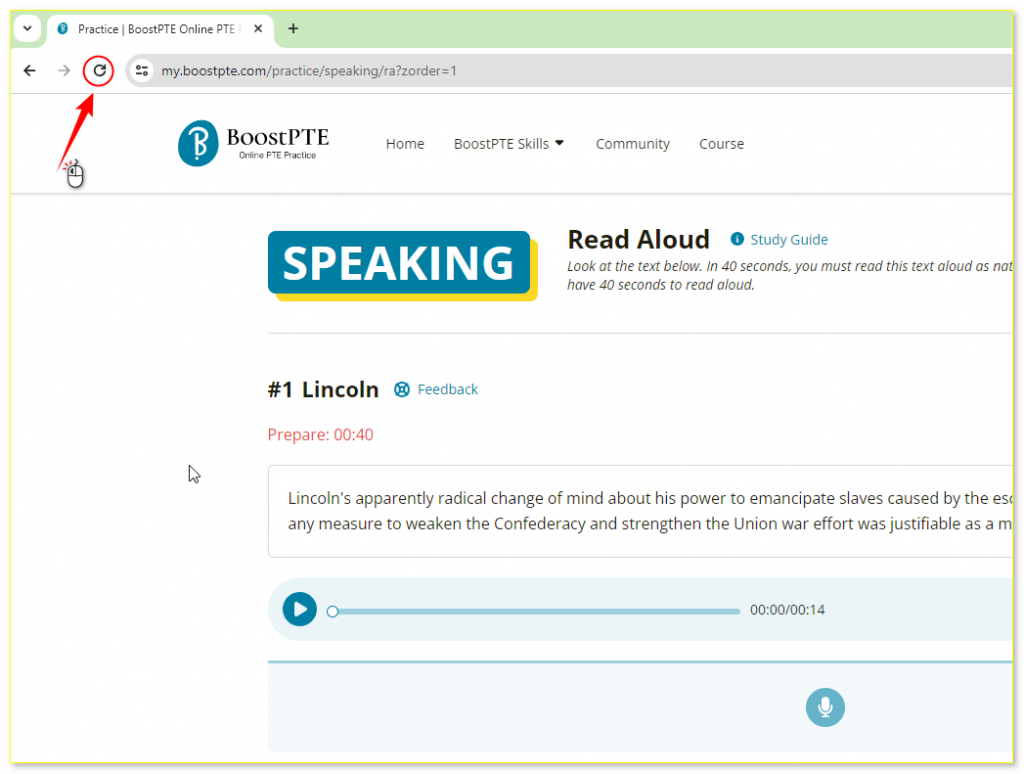
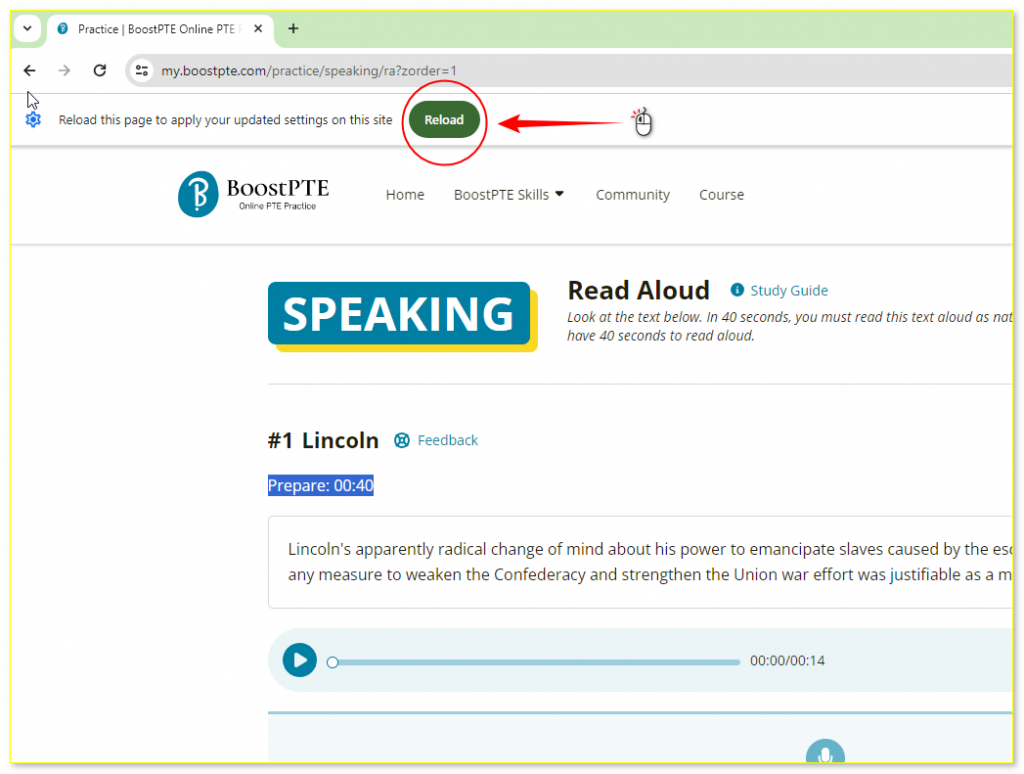
1. Reload the browser: After enabling microphone permissions, it is recommended to reload the browser. You can do this by clicking the reload button or by pressing the F5 key on your keyboard. Reloading the browser ensures that the changes take effect.
or
2. Test your microphone: Once the browser has reloaded, you can test your microphone by visiting a website or application that requires audio input. Ensure that the microphone is functioning correctly by recording or using voice commands.

